02 - Run Your First Python Benchmark
In this tutorial, we will walk you through setting up your first Python-based workflow.
Step 1: Create a GitHub Repository
Start by creating a new GitHub repository. For this guide, we’ll name the repository matmul-benchmark-python.
- Go to GitHub and create a repository named
matmul-benchmark-python. - Clone the repository locally:
git clone https://github.com/<your-username>/matmul-benchmark-python.gitcd matmul-benchmark-pythonStep 2: Add a Benchmark (Python Example)
We will benchmark a NumPy matrix multiplication. Create a file named matmul.py at the root of your repository with the following content:
import numpy as np
def matmul(A, B):    return np.dot(A, B)
if __name__ == '__main__':    A = np.random.rand(64, 64)    B = np.random.rand(64, 64)
    C = matmul(A, B)    print(C)
Step 3: Define a Workflow
Create a directory called .daisy/ at the root of your repository:
mkdir .daisyInside .daisy/, create a workflow file named benchmark-python.yml with the following configuration:
on:  push:    branches:      - main  pull_request:    types: [opened, reopened, synchronize, ready_for_review]
parameters:  timeout: 30  partitions:    - bellis5
steps:  build: |    sudo apt-get install -y python3-numpy
  run:    matmul:      command: python3 matmul.py      measurements: 1
This workflow:
- Triggers automatically upon every push to the main branch.
- Runs your benchmark on the bellis5 partition of our cluster.
Step 4: Commit and Push the Changes
Commit the files and push them to GitHub:
git add matmul.py .daisy/benchmark-python.ymlgit commit -m "Add matmul benchmark and workflow"git push origin mainStep 5: Run Your Python Benchmark
After pushing your changes, Daisytuner will automatically detect your workflow and execute your benchmark on our cluster.
You can track progress in two places:
- GitHub: Status checks will appear directly in your commits.
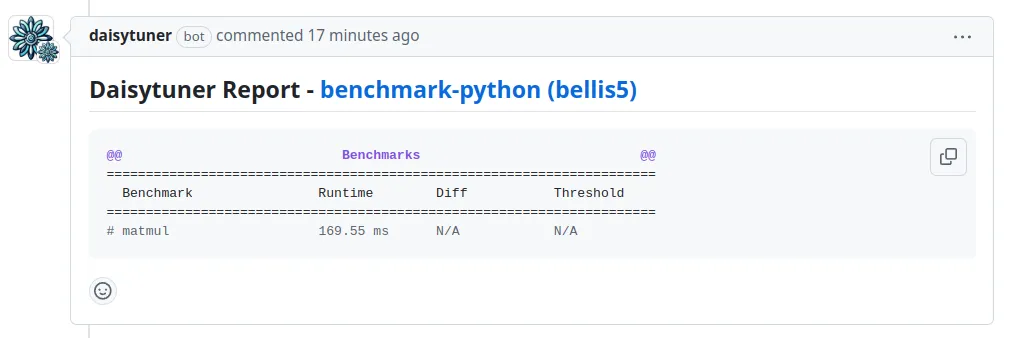
- Web App: Real-time logs and status updates can be found in the Web App. Make sure you are logged into the app with your Github account.
Congratulations! 🎉 You have successfully run your first benchmark using Daisytuner.
Extension: venv
You can also use a virtual environment for your workflow.
steps:  build: |    python3 -m venv venv    . venv/bin/activate
    pip install numpy
Extension: Conda
If you prefer using conda, you can set the conda parameter and the default is activated automatically for the build and run stages.
parameters:  timeout: 30  conda: "3.12"  partitions:    - bellis5
steps:  build: |    pip install numpy